This post may contain affiliate links.
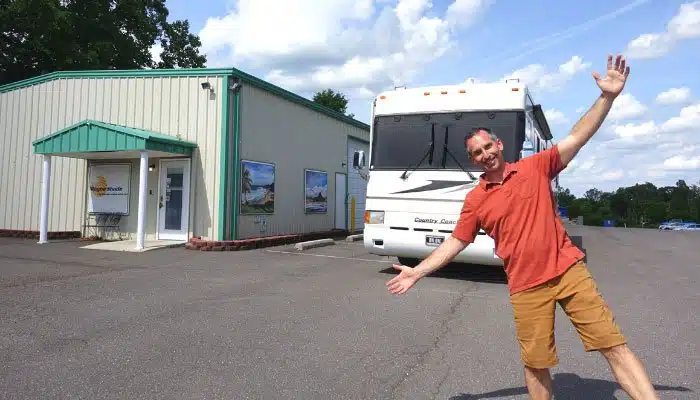
RV Repairs are part of RV life. Our main RV renovation we did last summer is still holding up well, after a full year of full time living, and driving all around the country visiting over 30 states and over 13K miles. That said, there were still quite a few projects, RV repairs and upgrades we made over the course of the year, and a list of projects to complete once we were settled at our friends property again.
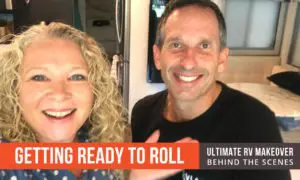
We have actually made 11 RV Repairs and improvements to the RV since our last update post and video. Watch the video for a visual walk through, and read on below for more details including costs.
What RV Repairs we will cover
With 11 RV Repairs and upgrades, there is a lot to share in this post. We’ll start with some of the updates made on the outside and make our way to inside projects.
Here is a list of the 11 RV repairs, mods and upgrades we will cover in this post in case you want to skip around.
- Fiberglass repair on the front of the coach
- Generator frame/support welding
- Magneshade window shades and Tire covers
- Replace starter for main engine
- Stairwell entry step update
- Built new shelf and organizer for passenger area
- Office desk cabinet for tech gear, Air purifier and Dehumidifier
- Reupholstered dining area seat cushions
- Mounted Magnetic Wine Glasses
- Replace damaged transfer switch
- New Awnings and topper from Tough Top Awnings
- Related Content
Let’s Jump in
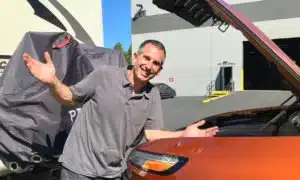
1. Fiberglass Body RV Repair
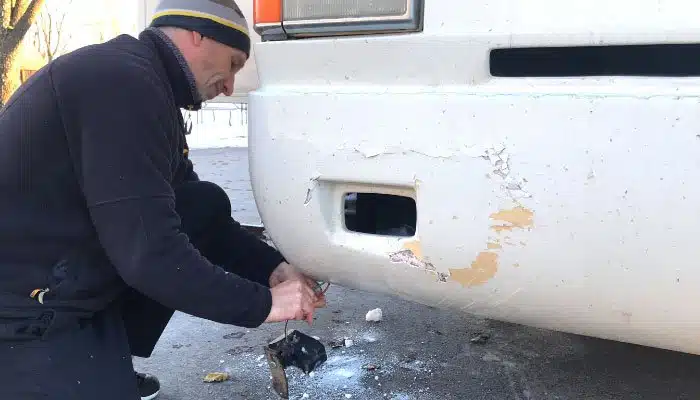
Last winter during our book launch tour, we got caught in snow storm and very cold temperatures. The icy conditions of the roads in the RV park, and an unfortunately placed pile of ice made for a very difficult turn.
I was unable to make the turn on the ice and the front of our coach met the pile of ice. It made a horrible crunch sound and put a huge crack in the bumper area of the front cap of our motorhome. We actually damaged more than one area the same day, but that will need to be a separate dedicated post and video.
The crazy thing was, our schedule and workload was so heavy over the winter that it took months before we felt we had time to repair it. Finally, while settled in our friends driveway in Georgia in spring, we made the time to repair it.
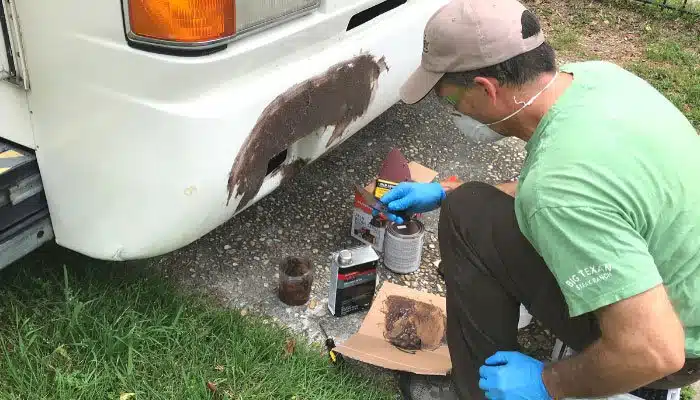
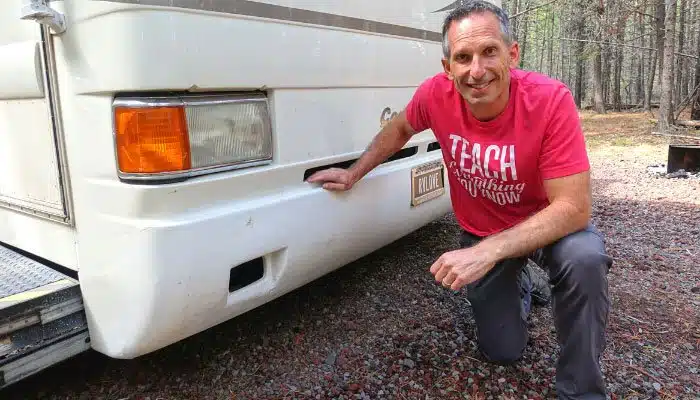
One of the benefits of driving a coach with a plain color is that it is easier to match without a professional paint and body shop. I was able to repair the fiberglass myself with over the shelf fiberglass kits and tools from an auto parts store and home depot. It took most of one day, and part of another for the project. Building up the fiberglass, then sanding down, smoothing out and painting. It isn’t a perfect repair, but it is vastly improved from where it was, and cost less than $75.
As our friend Chris from Technomadia said, “The most dangerous thing to pack is a schedule”. So true! Had we not needed to keep moving, it would have been much safer for us and our coach to stay put for a couple days for conditions to improve.
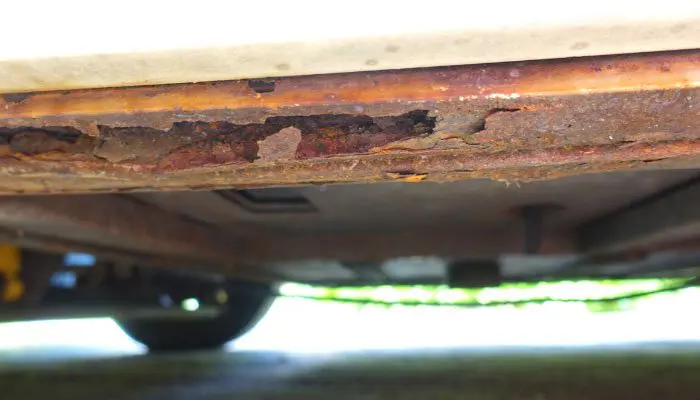
2. Chassis RV Repairs Under Generator
During our RV inspection when we were buying it, we noticed there was some surface rust on a few areas. It wasn’t overly concerning at the time, as most of it still seemed relatively solid.
Unfortunately, over the next year and a half of traveling out of the dry southwest and into many humid and salty areas, the rust worsened. It was really amazing how fast the salty and wet conditions accelerated it. The rust in some areas ate away quite a bit. One of the most concerning areas was near the front of the coach, under the generator.
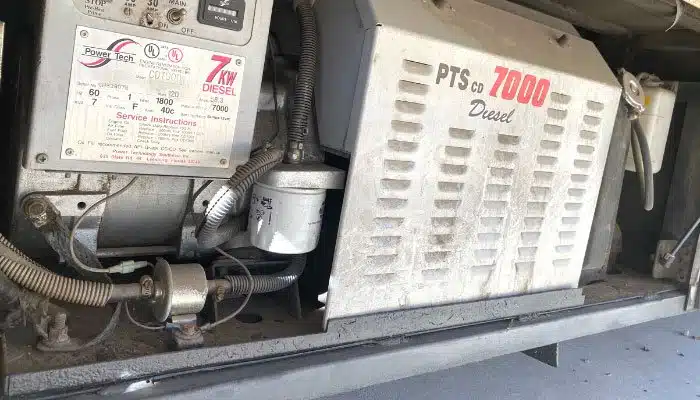
Our coach as a 7000watt diesel generator. It is very heavy, and the supports underneath it had experienced some of the worst rust. We were concerned that the weight of the generator could soon be too much for the supports and end up falling to the ground while driving. That of course was a significant safety hazard for us and others, so we got it repaired as soon as we could.
Fortunately, we had an opportunity to leave our coach at a friends welding shop for a few days while we attended a travel conference.While we were at the conference, he cut out all the compromised framing. He then replaced all the framing with new material and painted it with rust resistant paint. It is very solid now, and the cost of these welding RV repairs was only around $350
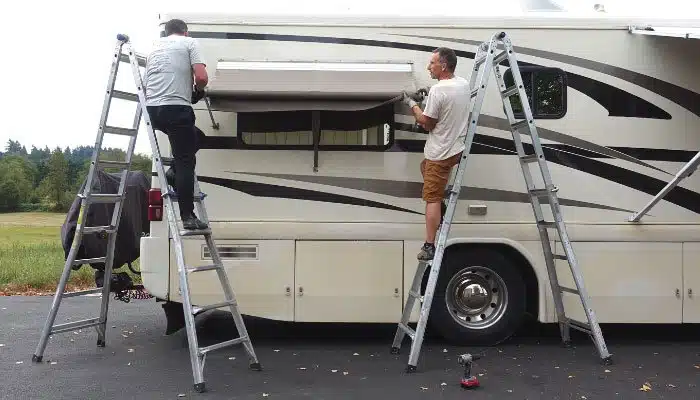
3. CC is Sporting Some New Shades
A more exciting update to the exterior of the RV was installing new window shades from Magneshade. When we bought our coach, it came with some average quality snap on exterior window shades. But we have had our eyes on the beautiful Magneshade window shades since we had our first coach.
This spring, we ordered a new set of shades for CC. The higher quality fabric and better fit provides better heat blockage, and also better outward vision. But my primary reason for wanting new shades was for safety.
Safety?
What do window shades have to do with safety? The snap on shades we had on our first coach, and originally on CC still do a reasonably effective job of providing privacy and avoiding letting the heat from the sun in. But putting them on, and taking them off is a much bigger job than with Magneshade. Putting on snap-on shades usually involves getting on ladders, or hanging over the window from the rooftop.
With a construction background, I am reasonably comfortable on ladders. But getting them out and setting them up on sometimes un level ground can be a hassle. So, I would often just try putting up my external shades by hanging over the edge of the roof. Well, there were a couple times, that I slipped a bit, and I decided that it really wasn’t a very safe way to do it. Even if I was reasonably comfortable, it might give somebody else the idea and they might get hurt.
This might be less of an ordeal if you only move a few times per year, but when you move more like once a week (on average) like us, I found that I often didn’t put my shades up because of the safety or hassle. Our new Magneshades can be put on in about 1 minute, and I don’t need a ladder or climb on the roof. All I need is a simple telescoping rod. Pulling the shades off can be done even faster, and uses no tools at all. They are a bit more expensive than the snap on variety, but the safety and convenience is worth it to us. Prices vary, but retail price for shades like ours would be $800. We absolutely love them. Oh, if you decide to order some for your RV, if you mention RVLOVE you will receive a free shade storage bag.
New Shades For Tires Too.
While we were getting new window shades, we decided to upgrade our tire covers too. I am a big proponent of covering RV tires to avoid UV damage, and also avoid the heat fluctuations from the sun beating on them.
For most of our RVing years, we used the ‘bag’ type tire covers that slip over the tires. They are effective at covering them up, but they have a few drawbacks that our new ones have eliminated. The first drawback is that the bag type covers tend to attract and collect bugs, spider webs, and debris like pine needles. I don’t like messing with all the bugs and junk stuck in them every time I take them off or put them on.
The second drawback is that, appearance wise, they cover up too much. I think the look of seeing the wheels on the RV is more attractive. These new covers allow the wheels to still show, while covering the tire.
Our new tire covers are also lighter and more compact than the old bag type, AND they stay on the tire better. The bag type covers can sometimes get caught by wind and come off into other people’s sites, or worse, blow away completely. Our new covers mount more tightly, and if they did come off, would fall flat so they are less likely to blow away.
They seem like little drawbacks of the old type. But if you deal with them day in and day out, having higher quality can make a big difference over time. Similar to the window shades, prices vary depending on size. But a set of 4 covers for a coach like ours would cost around $220. We are very happy with our new Magneshade Tire Covers too.
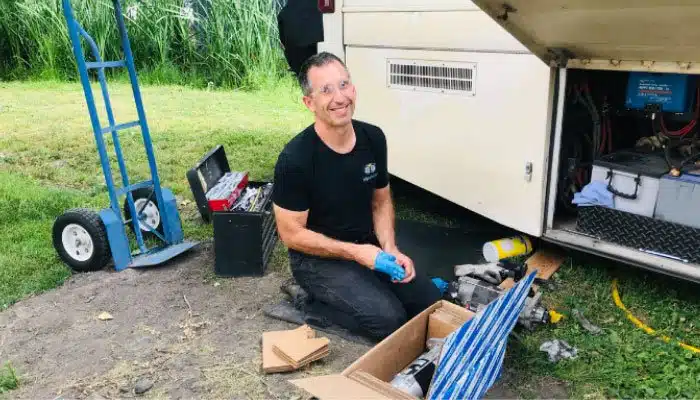
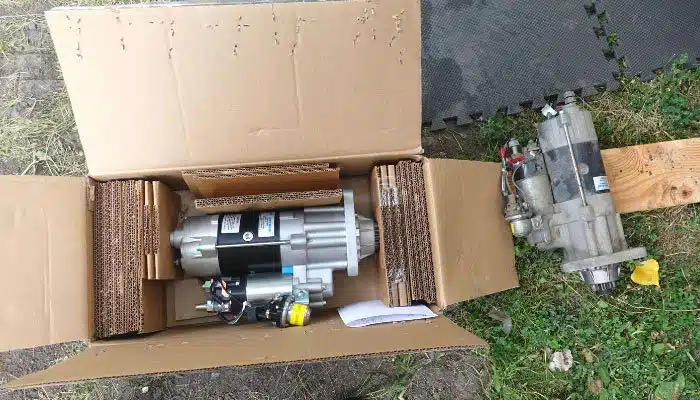
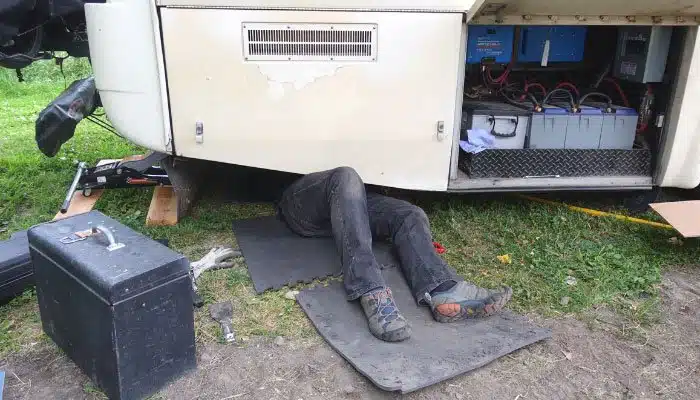
4. Replacing Engine Starter
Our next significant RV repair on the outside of the coach was replacing the starter for our main engine. We had a couple issues starting in the winter, that seemed mostly related to the ignition solenoid and battery connections.
We had the starter fail to click over once in the spring. I was able to get the coach started by tapping on the starter with a soft blow hammer while Julie turned the ignition key. That signaled that the starter might be a problem soon. We had a couple trouble free months after that. Remember, we don’t drive the coach every day like people who drive their cars to work.
On our big trip from Maine to Oregon in July we had a couple more times when the starter failed. So I knew a replacement was imminent. We made it to our friends property in Oregon by keeping the coach running as much as possible. This helped becuase we would not need to use the starter more than once per day, regardless of how many times we stopped.
Once settled in one spot for a few weeks, I was able to order a new starter. It was about $450 and was delivered in just a few days. I have done some mechanical work in the past, but was still a little nervous about this RV repair. But, knowing that we didn’t need to head out right away if there were any complications was a big comfort.
I was very diligent about labeling all wires and taking photos before removing the old starter, which helped a lot in the replacement. All up, the job took me about 3 hours. Doing the labor myself saved me a lot of labor costs on many of these RV repairs.
Side note:
Our coach doesn’t have hydraulic leveling jacks. It is only supported by the air suspension. So I was sure to place jacks and blocks in multiple areas under the chassis just in case the air suspension lost pressure while I was under the coach doing RV repairs. It was already a tight squeeze even with the system aired up.
Also, for the starter repair, and any welding RV repairs we did, we were sure to disconnect the batteries, to avoid any risk of damage to electrical components.
Let’s head inside for more improvements
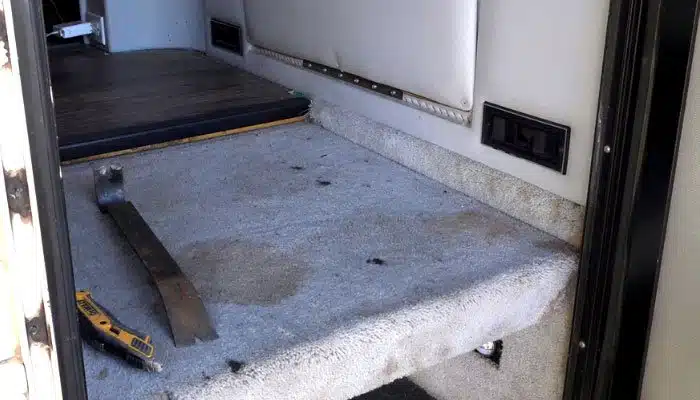
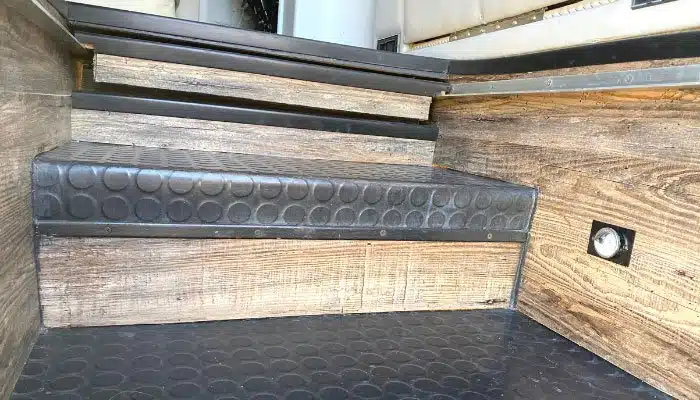
5. Upgrade RV Entry Stairwell
Ironically, one of the last updates and improvements we made to the interior of the coach was the first thing you see. The stairwell still had the original light gray carpet on the floor and walls of the stairwell. Being the entry area, this is most prone to dirt and grime, so light gray carpet is not the best material here. At least the step surfaces were covered in a black rubber material.
The area was especially ugly for Julie as a passenger. When riding in the passenger area, we slide out the floor covering the steps. That section really looked terrible. There were many stains, especially after Julie spilled her tea on it. Funny, we sometimes don’t realize just how bad something looks until it is replaced.
We replaced all of the carpet in the area on the flooring, and walls with luxury vinyl plank to match the rest of the flooring in the coach. It really looks amazing now, and is such a better welcome into our completely renovated RV interior. Amazed we waited this long to do that project.
The project took about half a day, and the cost of materials was less than $100.
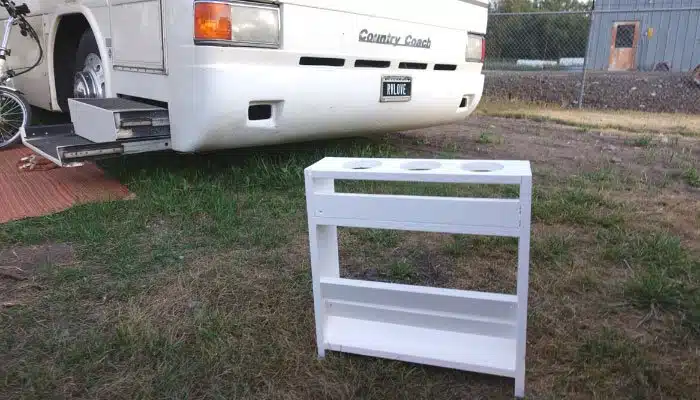
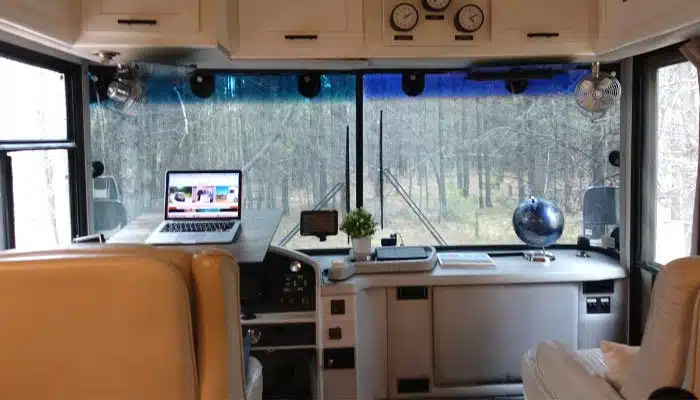
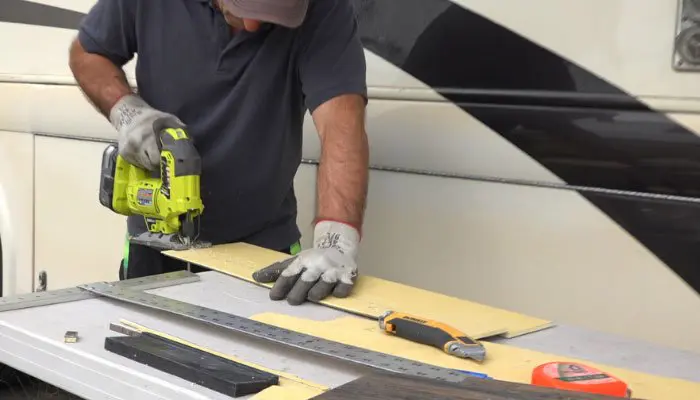
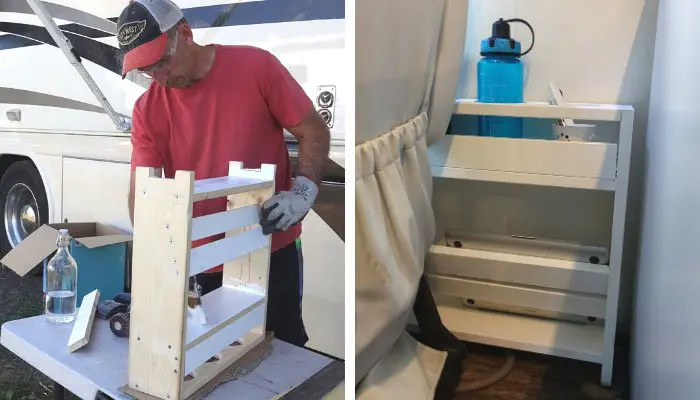
6. New Custom Shelf Organizer for Passenger Area
Once we had the tools out, Julie mentioned that she would really like a better solution for storing her drinks, small items and laptop on driving days. Previously, she really didn’t have any good options for holding a cup, which meant she would get up more frequently, or go without. She also didn’t have a safe place to rest her laptop when not in her lap.
After Julie explained her needs, I designed a simple shelving unit with an angled laptop storage area below, and three cup holders on top. It would slide between her chair and the wall, and would be small enough that it would still allow the chair to rotate. We like being able to rotate the chair so that it can serve two roles. First, being the passenger seat while driving. Second being an extra seat for the living area when we have guests.
The design of the new shelving unit was built using some scrap wood, and one single piece of purchased lumber. I was able to build it in about an hour, paint it and install it. Much more practical and useful than the simple magazine rack that was originally on the wall in that area when we first bought the coach.
7. A few More Updates to the Office and Living Area
We bought a simple bathroom cabinet from Target and mounted it to the floor next to our desk. This helped declutter the wires and other tech equipment for our work needs.
Two other additions in the area are to help the air quality and environment in our coach. The first is a Levoit air purifier we bought when staying in an area with high allergens. The Levoit air purifier seems to work very well. My allergy symptoms reduced significantly when inside our RV with this in use. We mostly only use it when we know the air quality is poor because of allergens, smoke or other pollutants.
The second is an Inofia 30qt Dehumidifier for when we stay in areas with high humidity. We bought the dehumidifier while staying in Florida last winter and have been amazed at the amount of water it can pull out of the air. This has been used a lot in the last year as we travelled to many humid areas. But probably will be stored in the basement when we spend the next few months in the desert southwest.
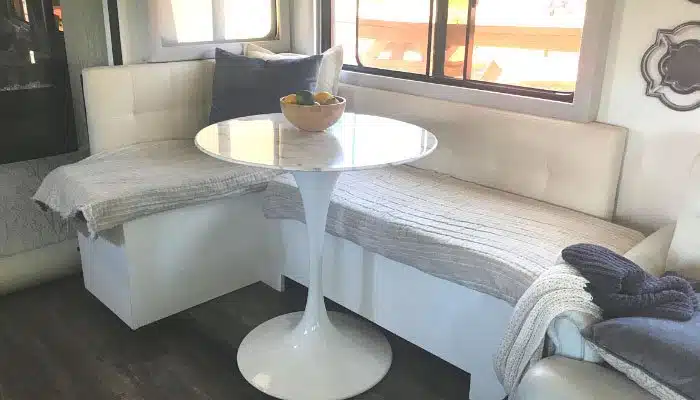
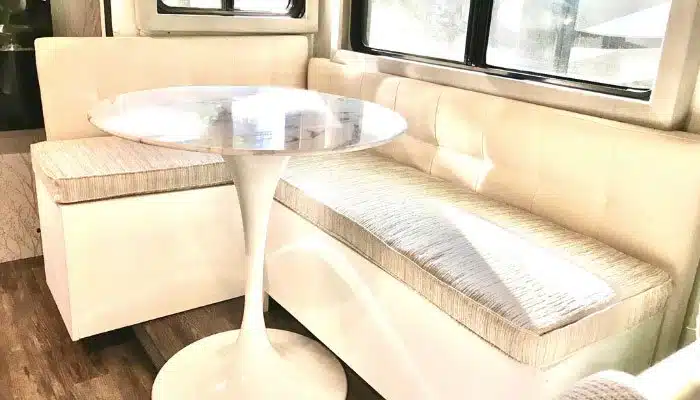
8. Re-Upholstered our Dining Area Cushions
The most exciting new update in the kitchen/dining area is that we FINALLY have proper seat cushions in our dining nook. Previously, we just had fabric loosely wrapped around the cushions. It looked ok, but would need to be re-adjusted regularly. And, with the fabric being made of bedspread material, it wasn’t holding up well.
In one of our previous posts/videos, we mentioned that we had been having trouble finding somebody who could help us create proper seat covers for the cushions. Part of the challenge was that we were moving too frequently for any shop with a waiting list. But the biggest challenge was finding anybody willing to do the work in the first place.
Fortunately Suzy, who had seen our previous mention of needing help, reached out to us and said she would be able to help us remotely. Julie and Suzy were able to connect via Facebook and share the needed dimensions and design, and even choose fabrics. Suzy was able to recommend a source for proper, durable fabric for seating areas, and we found some choices that would work really well with our design.
Once we received them
When we received the new covers in the mail, we were so excited. They were beautifully done, with piping on the edges, and long hidden zippers for easy removal. Just in case we need to wash or replace them. Suzy even sent us a video sharing tips on how to easily put our covers on our cushions.
Our final step was adding velcro to the top of the benches to align with the velcro on the cushion covers to help them stay in place even when opening and closing the access to the storage area within. We couldn’t be happier with them. Knowing how much trouble we had in finding such a perfect solution, we are also happy to share contact information for Suzy in case anyone else reading our content has a similar need. She doesn’t have a website as she has always had plenty of referral business. so we will just share her email and phone numbers below.
- Email: [email protected]
- Phone: 507.382.3802
9. Mounted Magnetic Glassware
A unique and simple upgrade we made was to our glassware. One challenge of the RV lifestyle is all the moving, bumping and shifting that occurs while driving, This makes it difficult to keep nice wine glasses safe, unless very thoroughly packed away. But we discovered a unique solution to the challenge that many others who have seen them have really liked.
Our new wine glasses have magnets embedded in the base that allows them to mount fully out in the open, underneath our cabinets. They look nice on display, are easy to reach, and require no extra consideration on drive days. We have driven on some very rough roads with them mounted under the cabinet and they have not budged.
In fact, we put these Silwy glasses and mounts through some rigorous testing in our dedicated review. Including driving around on steep dirt roads with a glass mounted on the hood of our Jeep. You can view our full video review by clicking this link.
You can buy direct from SILWY & save 10% with coupon code RVLOVE: https://rvlove.com/silwy – free shipping worldwide
Or Links to Buy from AMAZON (coupon code does not apply):
- Wine/champagne/beer glasses with coasters: https://amzn.to/2O7A1Ju
- Tritan glasses with lids & coasters: https://amzn.to/2JV78dQ
- Magnetic mounting strip: https://amzn.to/2Y0bASR
- Magnetic mat (cut to size): https://amzn.to/32Ia5aC
Other Interior Improvements
The rest of the interior has held up really well, and has required very little repair or updating. But, we did have one more significant repair to the electrical system.
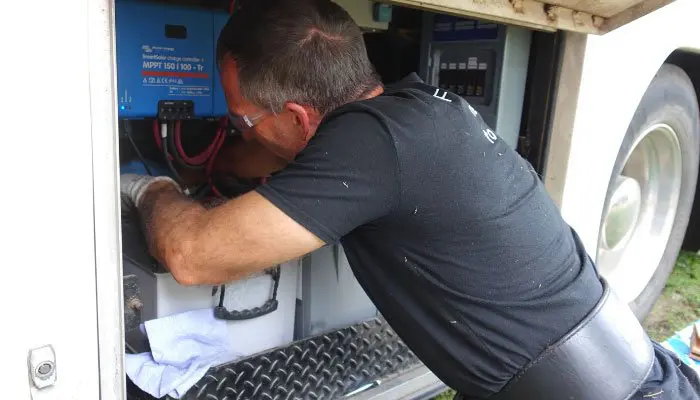
10. Replacing Our Transfer Switch
A few months ago, we were no longer able to receive power from our generator. The generator started and ran well, but would not provide power into the RV, or the batteries.
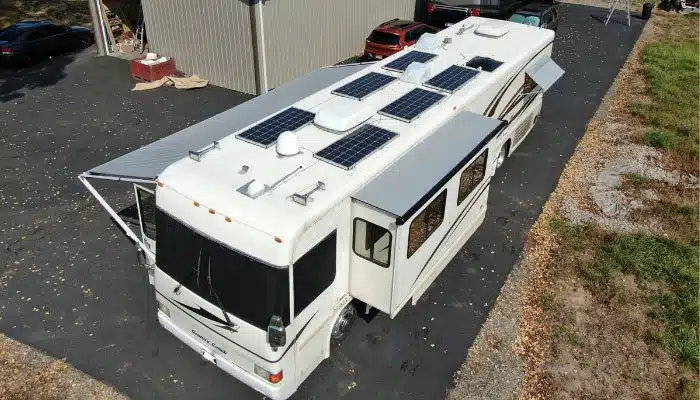
Fortunately, we were able to wait a few months to replace it because we could still get power from sources other than the generator. Everything still worked well when plugged into power at an RV park. But we also still had the ability to have most everything working when unplugged thanks to our substantial battery capacity and our solar power. That is, of course when there was sunshine available.
We like having the generator as a backup in case we go multiple days with high electrical load but limited sun. As long as we have good sun, and we watch our use, we can go weeks, or even months unplugged from power. Learn more about our off grid system with this link.
Back To Our RV Repairs
Doing some troubleshooting and research I was able to narrow it down to a component called a transfer switch.
The transfer switch basically decides which source of power to use for your needs. In our case it has two inputs (generator or power pedestal), but only one output. The circuit board on our transfer switch had been damaged, so it would no longer accept power from the generator. Being a 20 year old coach, the original unit is no longer available for replacement (unless from a scrap yard). But, the basic function of the transfer switch is relatively simple, so an aftermarket part can easily be used if you can figure out the wiring.
Fortunately, our transfer switch had a wiring diagram on it. So, when we bought a new one, we could simply start matching up the diagrams to know where to put the input and output wires. Part of the reason I waited to do some of these RV repairs was I wanted the support of more capable hands when it came to electrical work. And, if something went wrong, I also wanted to know that I would not need to move the coach soon. Our friends, Brett and Danelle’s, property was the perfect opportunity for the RV repairs. And Brett, being a retired Air Force flight engineer was the perfect person to help/do the job for us.
Brett (with me in just assistant role on this one) was able to swap out the transfer switch in a few hours. The part was less than $200, but if we would have had the repair done in a shop, the labor would have doubled the cost, and fitting into an RV repair shop schedule might have been more difficult too. Thanks again Brett. You are awesome!
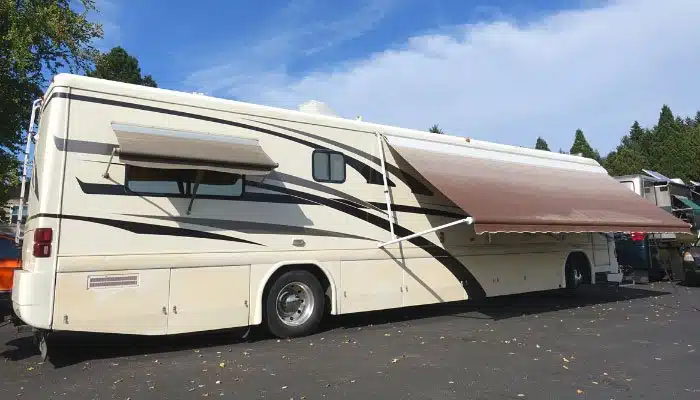
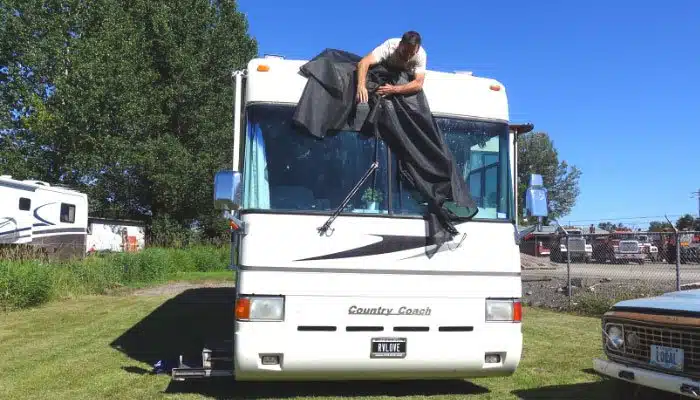
11. Topping It All Off!
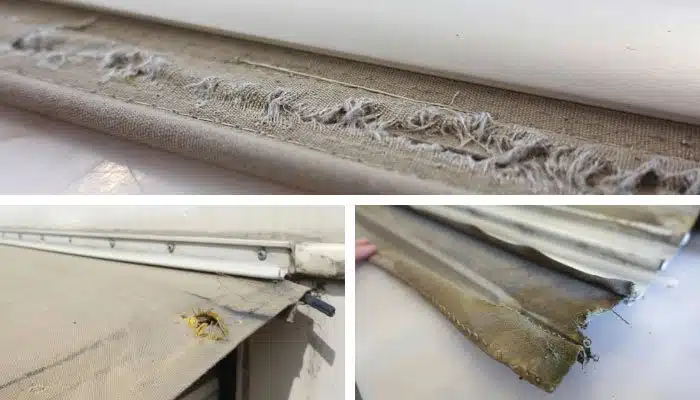
Another very exciting upgrade are our new Tough Top Awnings! Previously, our coach had completely mismatched awnings and slide topper. The slide topper was a yellowish canvas that had started to tear and mold. Window awnings were a khaki colored canvas and were falling apart. Our main patio awning was much newer at only two years old, and very little use, but was already showing signs of wear.
We were able to replace all the fabrics with matching light gray vinyl from Tough Top Awnings. The new material looks fantastic, is mold resistant, and water repellant. Water just beads up and runs off. Our old toppers would soak it up, and then need lots of time to dry, thus part of why they are prone to mold. The slide topper was loose and incorrectly sized so it would make a lot of noise in the wind. And being porous, would allow water below it, pooling up on the top of the slide.
An Unwelcome Surprise
The water pooling on top of the slide with our old slide topper meant that if I was needing to leave shortly after a rain, I would need to squeegee the top of the slide before bringing it in, and then towel dry off once inside. There didn’t even seem much point in even having our old slide topper sometimes. If I forgot to do those extra steps, the first time I hit the brakes on my drive, I would end up with a waterfall of water crashing down on my head as the water ran off the front of the slide which is right behind the driver seat. A very unwelcome surprise cold shower. If it went off the other end of the slide it could pour onto our electric fireplace before hitting the floor.
While replacing the fabrics, we were also able to tighten up the mechanisms of the awnings to they work much better. We are amazed at how much better our awnings and toppers look and function now. This was a massive improvement to our coach.
We had our fabric replaced at the factory. But this is a relatively easy job to replace the fabric as a Do-it-yourselfer. In fact, the vast majority of their customers do the installation themselves. As long as you have a couple ladders and at least one extra person to help. Prices vary widely depending on how many covers you need. We replaced a massive 20+ foot long awning, two window awnings and a large slide topper. A large project with four shades similar to ours would be around $1000.
Check out our more recent dedicated blog post and video about our new RV awnings here.
Coupon Code To Save 5%
If you are looking to replace or upgrade your fabrics, we were able to secure a discount for our RVLOVE community. Simply use coupon code RVLOVE to save 5% on your order. Tough Top Awnings can ship the material to your door in a variety of different colors to match or enhance the look and function of your RV. Check out their website at https://www.toughtopawnings.com or call them at 360.953.3299
Final Notes on Our RV Repairs, Mods and Upgrades
Whew! Now that we put this list together, I realized that was a LOT of RV repairs and upgrades we have made since our last improvement post. Hopefully you found some ideas and inspiration for your own RV in the list above.
We are so excited about our updates and improvements to our CC. The renovation is holding up very well, and we are still very happy with the choices we made. It is so comfortable and livable inside. Being a 20 year old coach, she still has some quirks and things that go wrong. But fortunately, most of what goes wrong is less complex and easier to fix myself. It has been a good confidence booster, doing so many things myself. And has been nice to not need to schedule in time in shops for our RV repairs..
Thanks again for visiting our site. Please let us know if you have any questions or share any comments below. We love hearing from you.
Related Articles
- Watch Our RV Makeover Series:
- RV Extended Warranties – Are thy Worth it?
- RV Inspections
- Visit our Gear page
Centralized links mentioned in video and post above:
- You might have seen our inflatable tandem kayak in the video. It is an Intex Explorer K2 https://amzn.to/2HxbbNp
- Magneshade window covers and tire covers https://magneshade.com/
- Tough Top Awnings for slide toppers, patio awnings and window awnings. Remember to save 5% with code RVLOVE
- Email address for Suzy at Lake Country Upholstery: [email protected]
- Magnetic Glassware from Silwy save 10% with code RVLOVE when buying direct, or use amazon links mentioned above in post.
- Inofia 30 quart Dehumidifier https://amzn.to/2NcSzWc
- Levoit Air purifier https://amzn.to/33g2Cz6
- We regularly get asked about our vertical electric fireplace in the dining area. https://amzn.to/2JM9yMS
Sign up for our email newsletter with the latest RV park reviews, news and updates.
GOT COMMENTS OR QUESTIONS?
We would love to hear from you. Drop us a note in the comments section below.
More RV Makeover and Repairs Content
Want to check out more on our Ultimate RV Makeover Series, and repairs content? Hover over each image to see the title and episode name.
When to Buy an RV Warranty For Best Value
The Real Cost of RV Ownership. Here’s What We Spent.
Jeep Death Wobble Fix Update – How We Fixed It
RV Extended Warranties. Are They Worth it? 2024 Update

12 Lessons Learned from Our RV Renovation
Getting Our RV Ready To Travel After our RV Makeover

What Did It Cost? and RV Renovation Questions
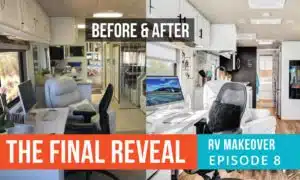
Episode 8 The Final Reveal | Ultimate RV Makeover

Episode 7: Finishing Touches | Ultimate RV Makeover
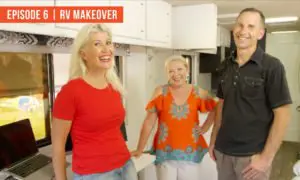
Episode 6: We’re Nearly There! Ultimate RV Makeover
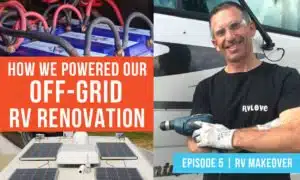
Episode 5: Powering Our Off-Grid RV Renovation | Ultimate RV Makeover
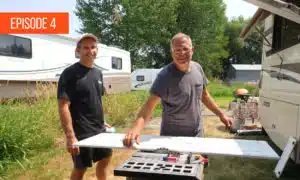
Episode 4: Re-Building Our RV | Ultimate RV Makeover
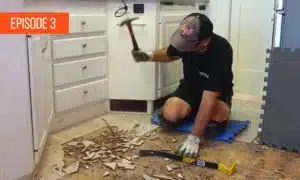
Episode 3: Tearing Our RV Apart! | Ultimate RV Makeover
Episode 2: What Are We Going To Do? Ultimate RV Makeover
11 thoughts on “11 More RV Repairs, Mods and Upgrades To Our Motorhome”
Hey! Love your mods to CC. I’m thinking of replacing the vinyl flooring in our Bounder. I’d like to use flooring similar to what you used. However, how do you know the new height of the flooring will not interfere with the slide outs? Did you take the original vinyl out before installing the vinyl planks?
Glad to see you are thinking it through. Our slide mechanism in CC does not make contact with the floor using rollers like many other slides. We did remove remove all of the original tile and carpet before putting down the new flooring. Good to try to keep your flooring at a similar height before and after your changes, but likely better to be lower than higher if you have to choose. -M
Marc,
Thanks so much for the information.
You are very welcome.
Good post with very useful info. I especially appreciate you adding approximate costs for each of the mods and contact info for the vendors. Many bloggers don’t provide this info rendering the info less helpful.
Glad it was helpful to you! Cheers
I really enjoy your Blog. I was reading about the dehumidifier you recently bought. We are not fulltimers but have a 34′ travel trailer. We live in South Carolina but rarely camp in Nov., Dec. Jan. and Feb. The camper is under an open shed so it’s always in the shade and I can see white looking mildew on the furniture and woodwork after the cold weather. Would this type of dehumidifier work for this or do I need something entirely different? The write up mentioned it needed to be 95 degrees so that’s not my problem. Being from SC, we are used to the summer humidity. I know y’all are fulltime and might not know about problems when a camper sits unused in the winter, but thought it was worth a try. Thanks so much.
Hi Linda, Yes being full timers and never having lived in SC or having the specific issue you mention, we can’t be certain. But I would expect you have humidity there. I would say it is definitely worth a try. You will need to be able to power it though, so hopefully you can run a cord in. This is the one we have and we love it – https://amzn.to/2NcSzWc – it’s been an ideal size for our motorhome. Friends with a smaller travel trailer got it too and works great. it’s fairly compact and slimline. Good luck!
Our CC is having starter issues too. Where did you order your starter from?
Hi Gordon, Julie here – that is a question for Marc – I’ll have him respond to your question tomorrow. Works great now!
Hello Gordon, We ordered our starter via a truck repair facility in Enterprise Oregon called Stangel industries. But it is important to note that when you do google searches for replacement parts for our engine it came up with a very different starter than what was in our coach. The shop actually had the part suggested online, and let us take it home just in case it was the right replacement, even though he was pretty sure it wouldn’t be correct. Smart guy. But as soon as I took out the old one it was clear that they were different. So, I ended up taking our starter into his shop so he could use it as a reference to find the correct one. Just in case it is of use to you. The invoice for our new starter shows LNM105602. Price was $427 plus shipping. Hope that helps