This post may contain affiliate links.
In Episode 3, we focused on our RV Demolition. We really tore CC apart, so we were deep into this RV renovation. Now in episode 4, we start the re-build. As you’ll see, it was a big process. At times, we wondered if we had bitten off more than we could chew, especially considering our tight timeline. But, there was no turning back. Time to get started on our construction projects and start putting CC back together. Watch it all start coming together in the video and read on for more details and photos.
This week we give you a glimpse of some of our major reconstruction projects. There was a lot going on. Luckily, we had a team to help us and everyone really jumped into it. Some of the projects we cover in episode 4 include:
- Rebuilding the water damaged walls/floor
- Designing and creating a new dining area
- Finalize plans for our feature wall and fridge cabinet
- Flooring (what we chose, final prep, and starting to lay the new floor)
- Cabinet modifications and refinishing
- Prep and paint work
- Shopping for design elements
- Tile backsplashes for the kitchen and bathroom
- Start re-installing cabinet doors (how did the flip work out?)
- Installing new Fantastic Vents
- Re-upholster window valances
Being a few weeks into our stay on Brett and Danelle’s property, we also needed to address the fact that, not only are we NOT hooked up to electric power, we are not hooked up to a sewer connection either. So we needed to find a way to dump our black tank, and other challenges of living in the RV during our off-grid renovation. More on that below.

Thanks to our Team!
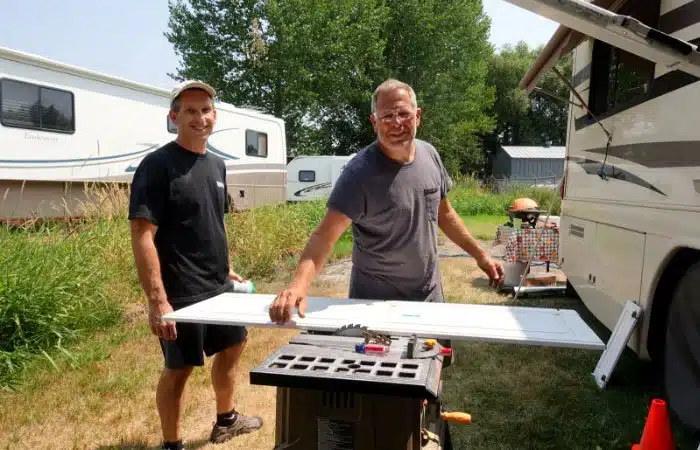
As you’ll see in the video – and this post – this mammoth job was truly a team effort. We want to give a huge shout out to our friends for all of their incredible help.
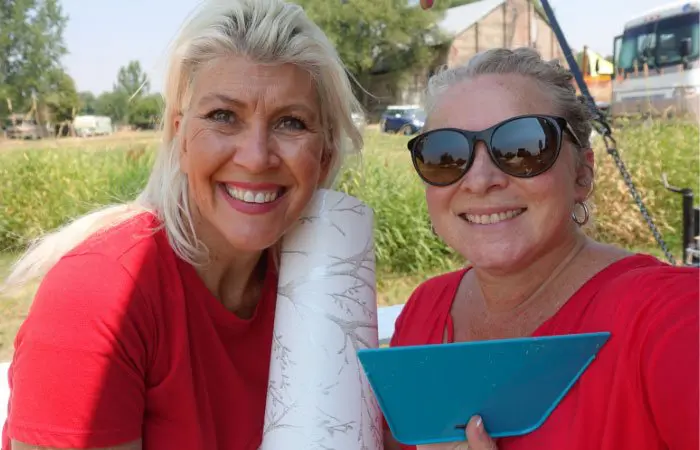
Jane Brown – for her design expertise, shopping ninja skills, staple removal, painting prowess, tile-apprentice work, and endless hours of re-upholstering the window boxes! She’s a pretty handy woman to have around.
Brett Hays – for being the Fantastic Guy – testing, removing and installing our Fantastic Vents/Fans. Working on the cabinets, helping lay the floors, loaning us your tools, keeping us all entertained and even feeding us at night. Oh, and for letting us park on your property. He’s kind of a big deal.
Danelle Hays – for helping Jane with the valances, endless stapling, decor, your moral support and friendship, and more I can’t think of right now. Not to mention making us feel so welcome on your property.
Bruce – for being available at such short notice to spend two days tiling our backsplash and putting up with the chaos of our RV renovation, and teaching Jane a few things too.
1. Re-build water damaged walls
In Episode 3 you would have seen that when we removed the booth dinette area, it gave us better access to an area that we suspected had some water damage. Though not severe, we chose to remove large sections of the former wall to allow us to treat the area preventing mold issues. This also meant we needed to rebuild the interior of those wall areas.
We found the cause of this leak when it first occurred in Texas the month prior. The joints where the slide room walls connected on the exterior had separated. That allowed the opportunity for water intrusion. We removed the old silicone and reapplied new silicone to the areas to properly seal it back up. It has not leaked despite multiple hard rain storms since then. But we had to repair the interior damage. After stripping away all the old, rotting wood back to the steel frame and insulation, we treated the area. We sprayed it with bleach to prevent mold occurring. We also sanded the rust off the metal and sprayed it with some rust prevention paint,
Re-building the wall face was actually pretty easy. We just cut some wallboard to the correct size and shape and secure it to the existing wall. If we were needing to match wallpaper or wood stain, it might have been more challenging. But since we were painting everything white, it was simply a matter of matching the paint. Other water damage in the RV was a bit more involved.
2. Addressing the water damaged floor areas
Two areas of the RV had water damage to the floors as well. There was a very recent, and relatively minor leak from our original toilet. This was mostly only on surface level and was a fresh water leak, not sewer (thank God!). Turns out it was a leaking water hose, that we suspect got damaged while removing the tile, so the water hadn’t been there long. We were able to replace the hose also prepped the area for replacing our toilet with a new Dometic 320 toilet. Having pulled up all the tile in the toilet room, and neighboring areas, we were able to dry out the wood floor and treat it with bleach to avoid risk of future mold growth.
Fridge floor area
The second, more substantial floor damage in the kitchen/fridge area was from an old water leak that had destroyed the previous fridge cabinet, and the floor beneath it. The leak likely came in from the water line to the fridge – as identified during our RV inspection. However, as we had plans to replace the RV fridge with a residential fridge anyway, we knew we would remove that old nasty, damaged wood.
During our fridge replacement, we completely removed and covered the former fridge vent. A Texas storm hit us before we had a chance to seal up the roof vent, and water came bucketing down inside the RV. So that caused some water damage to the floor. We had also removed the entire former cabinetry around the fridge, including the front of the wall behind the fridge.
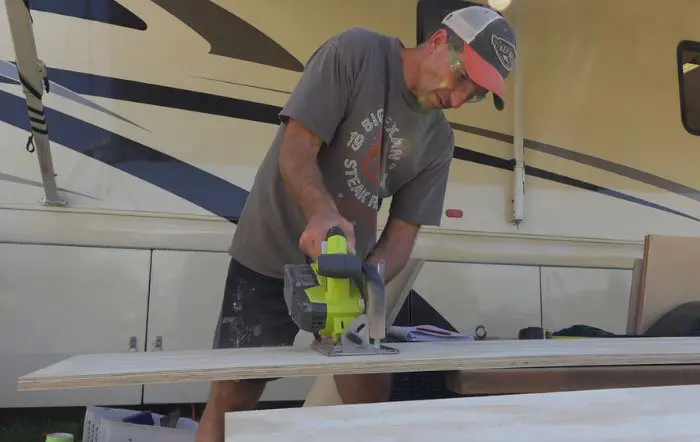
With the floor being significantly damaged, we needed to cut out and remove a section of the subfloor to fully access all of the damage. We cut a new piece of plywood to replace the flooring we removed, and re-built the walls behind and around the new fridge when installing it.
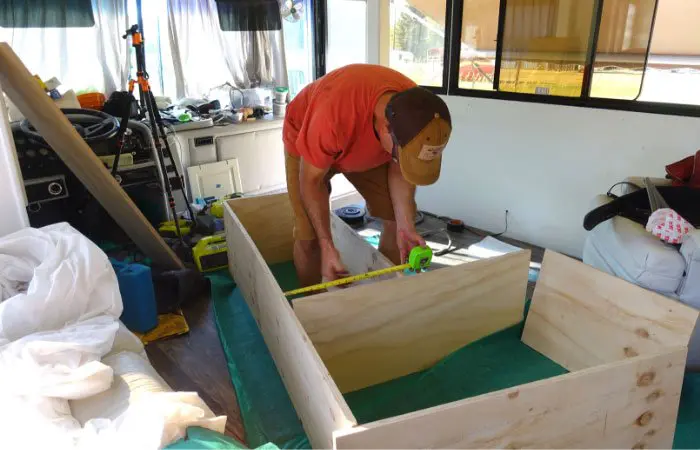
3. Designing and building new dining area
Beyond the basic restorative construction, we also were able to have a little fun creating an entirely new dining area. We had lived with the RV for a few months, and also thought back to what we did in our previous RV dining area. There were a number of considerations in the new design.
- Julie likes to put her feet up and look out the window.
- The current seats were too high and deep for our shorter legs. We couldn’t sit back in the seat, and it reduced floor space.
- We like the flexibility of having a table that can be moved to other areas of the RV.
- We wanted to make sure we maintained usable storage in the area.
- Didn’t like the bulky back of former booth dinette separating the dining from living area.
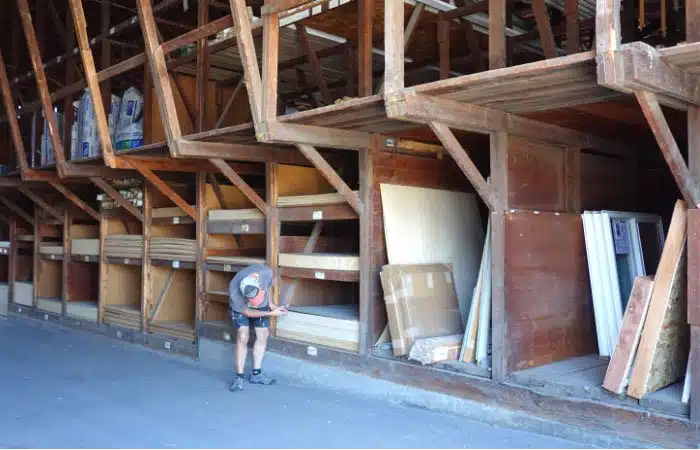
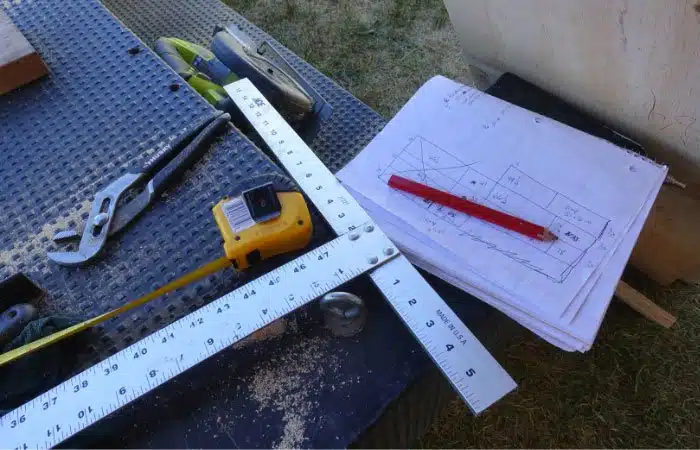
Our new design needed to account for all of our practical and visual needs. We drew up detailed plans for the new booth before we went to the lumber yard. Trips to the lumberyard involved cleaning off our construction table/trailer and a further drive than the local hardware store. This would involve multiple hours, so we wanted to get any and all large pieces on one trip.
4. Finalize plans for feature wall and fridge cabinet
That same trip to the lumber yard also needed to pick up all the wood for our feature wall, the fridge cabinet, and re-building the water damaged walls. We were recycling and up-cycling as many materials as possible in this project, and actually had very low waste of lumber. We only needed to buy two sheets of ¾ inch plywood, 1 sheet of wallboard, 1 sheet of foam insulation. Other long boards were the baseboard trim, and lumber for new light fixture assemblies, which we’ll share more about in a future episode.
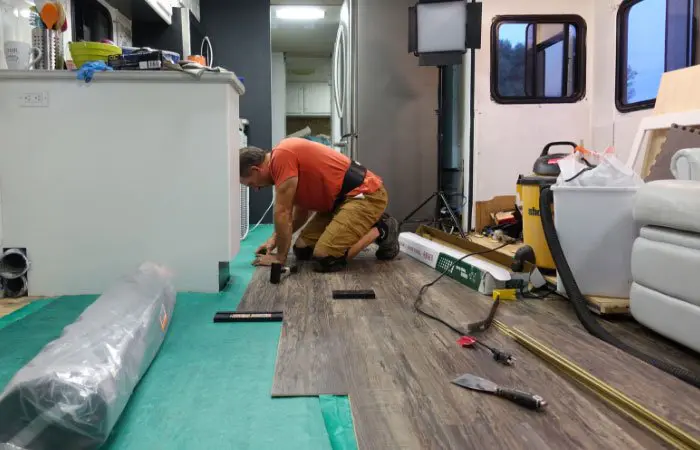
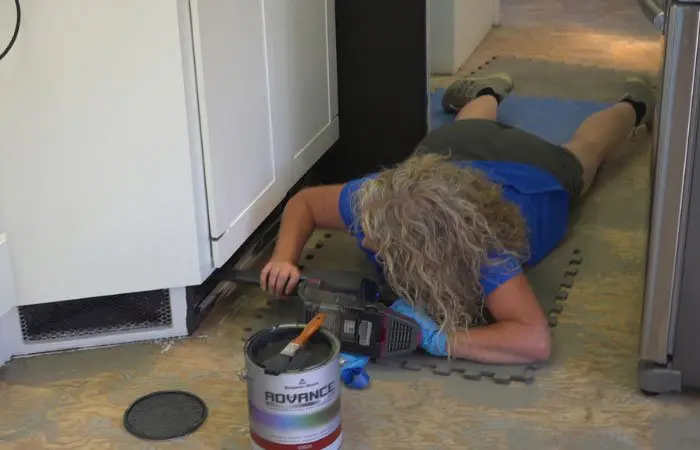
5. Flooring (what we chose, prep work, and laying the floor)
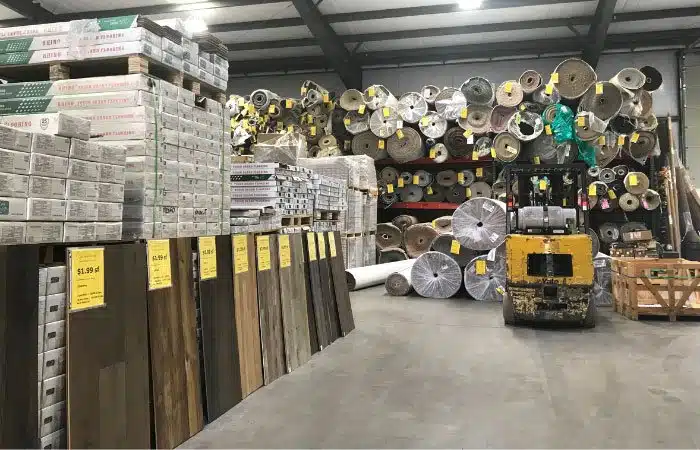
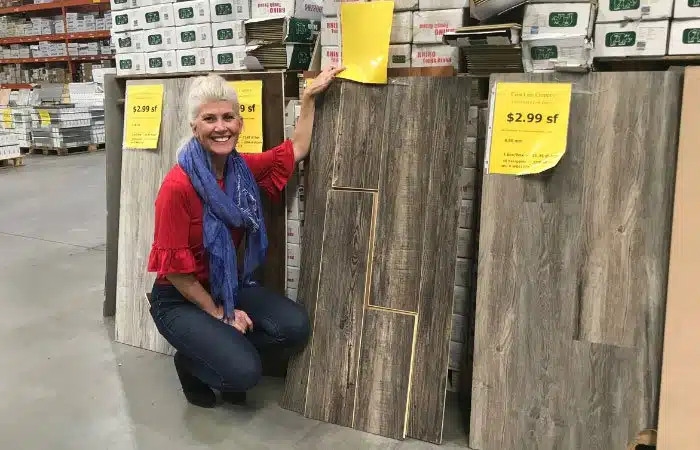
Julie and Jane took a road trip to a large flooring store a couple hours away. They found the perfect luxury vinyl plank (LVP) flooring. We also sourced a great felt underlayment online that would make the floor quieter and better insulated from the cold.
Flooring was a big job, but it also very rewarding as it is one of the largest visual impacts of the renovation. We bought the new flooring early on. But we didn’t install it until after we had completed all demolition, most of the painting and other big jobs to avoid risking damage to them. This meant living with bare wooden floors for almost a week. It took many days just in floor prep anyway, between removing staples, tile grout, sanding, and prepping the floor.
We filled in low points with ultra-thin concrete mix after knocking down all the high points. We wanted a very smooth sub-flooring before laying down our click and lock flooring so that it would all come together smoothly. When installed properly, the flooring can provide a water tight seal. We also signed the subfloor before laying the final piece for a little nostalgia and fun for any future floor replacements.
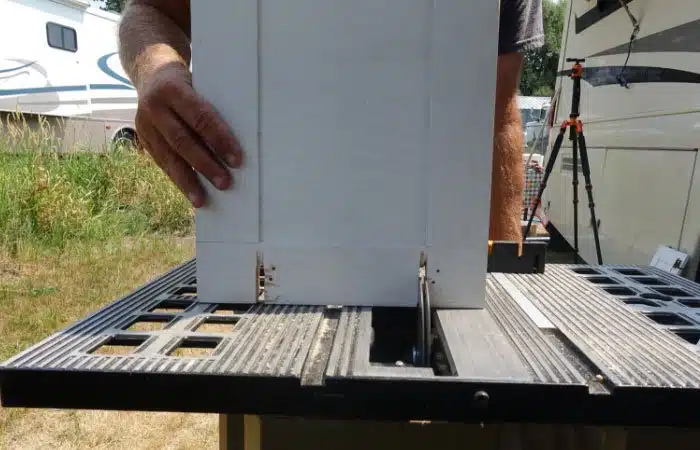
6. Cabinet modifications and re-finishing
As you likely saw in previous episodes, we chose to make a bold move and flip the existing cabinet doors around to completely change their look while still using the existing doors and hinges. We did a successful test on an old over-fridge cabinet which gave us extra confidence, but there’s nothing like putting the saw to the real cabinet doors. There was no going back at that point!
Our friend Brett created a custom set up on the table saw with dual blades to make consistent cuts. There was a downside of that dual blade set up. Most of the time, when finishing the cut, the saw would shoot a chip of wood out and hit Brett in the stomach. It came out really hard, so it would sting and leave welts. Brett was a good sport about it all, and Julie couldn’t stop laughing while filming him. But that was just the beginning of cabinet work.
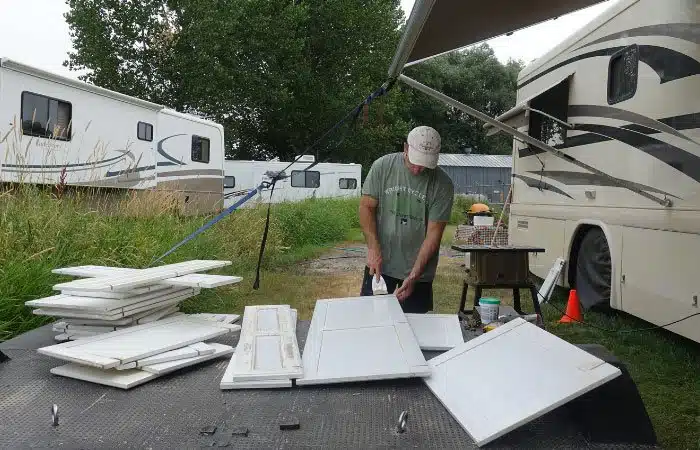
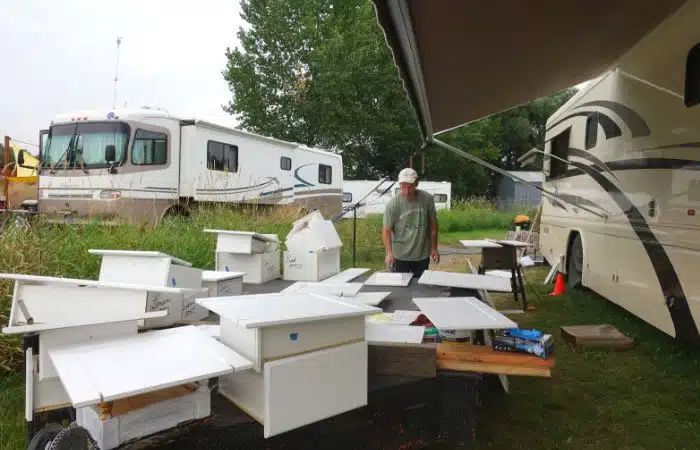
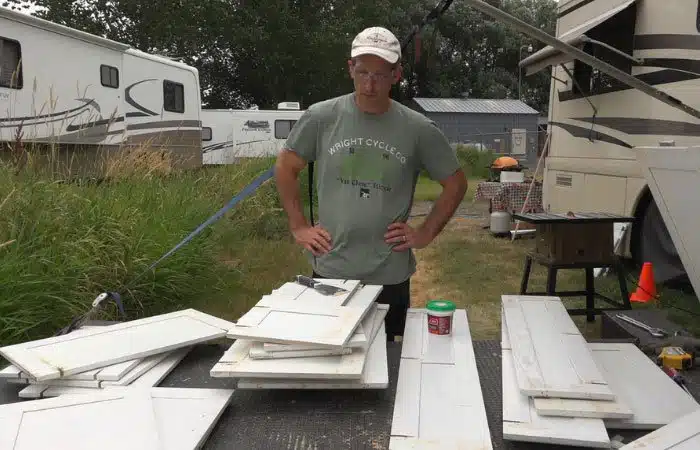
7. Prep, primer and paint cabinets
Once the new hinge grooves were cut, the cabinets then needed to have all the holes patched. They also needed to be stripped of glue from the mirrors, and sanded down. Being 20 year old original wood and glue, some of the cabinets also fell apart during the process and had to be glued back together. All the doors needed sanding, cleaning, puttying and caulking before painting with primer, and finally paint.
It’s easy to forget how many cabinet doors you have in your RV until you have removed them all and sit them all our on your workbench to refinish. Thank goodness we were painting white onto white. We spent about 3 full days reworking and refinishing cabinet doors and other RV prep before we were ready to start painting. This project would have been even larger if trying to change from traditionally stained cabinet doors to a new color because you would also need to paint inside the cabinets.
8. Prep and paint other walls and doors
It wasn’t just the cabinet doors that needed all the prep work. We also needed to prep the 3 pocket doors in the RV, all the walls, cabinet faces and even some areas of the ceiling. We painted virtually every wall, cupboard and cabinet in the RV.
When painting a traditional home, most of the paint can be done with rollers on the expansive walls. However, in an RV, because it’s a smaller space, far more of the painting needs to be done with brushes, and other detail work. We also ended up using more than one paint color. You’ll get to see what we used where soon, but to give you an idea, we had two different primer paints, and three paint colors.
There was a lot of detailed brush work, and the added challenge of painting next to a carpeted ceiling. This is far less forgiving of errors than traditional hard surface ceilings. So I (Marc) did those, as I’ve had a bit of experience painting and am able to hold a steady line, even without using blue tape. Must be all that practice painting model cars as a kid.
9. Shopping for decor and other design elements
As we were situated in a small town over 60 miles from the nearest stop light, shopping choices were very limited in Enterprise, OR. That meant Julie and Jane needed to drive a reasonable distance to find a good selection of stores for shopping. They headed out for two significant shopping trips.
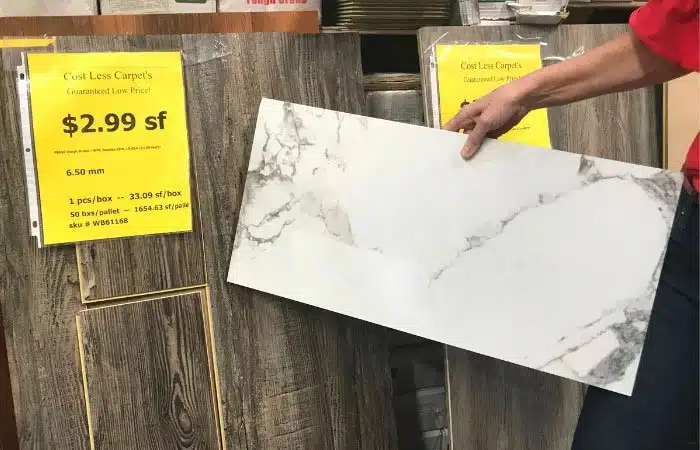
One trip was for flooring and tile, which they did on the way back from Julie picking Jane up from the airport 3 hours away. While at the flooring shop, they chose a really nice luxury vinyl plank in brown with hints of grey, plus a beautiful white and grey marble finished ceramic tile for the kitchen backsplash. After Jane arrived in Enterprise and did a walk through of the RV, she was able to decide on which direction she wanted to go with design and color. The girls headed off on another shopping trip for the decorative and design elements.
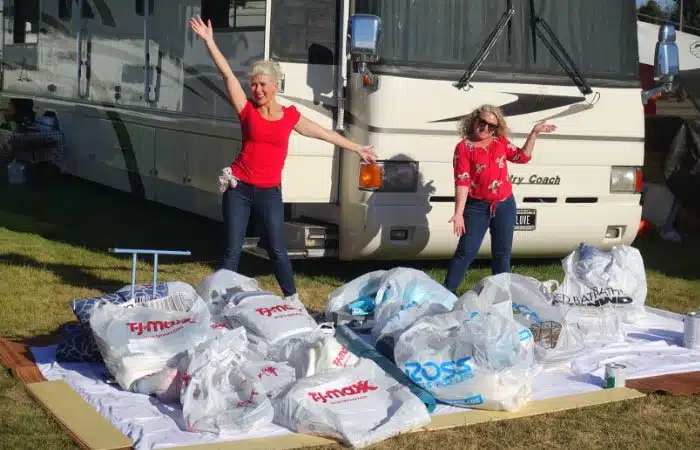
Trip to Idaho
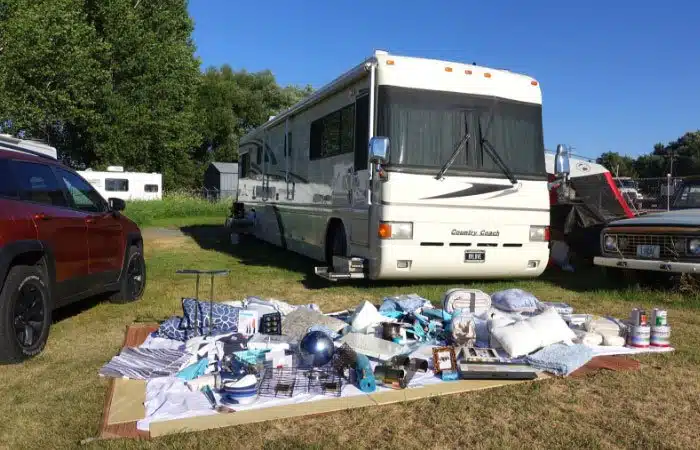
They decided to drive to Boise, Idaho – a 4 hour drive each way – to give them the best selection of stores and be able to get everything they needed in one big trip. Julie and Jane spent 2 nights in a hotel and shopped for two whole days, often until the stores closed as late as 11pm. They shopped everywhere from Bed, Bath and Beyond, to Ross, TJ Maxx, Home Depot, a paint store, Pier 1 imports and Target.
The Jeep was completely filled with all their shopping, and they gave the credit cards a good bashing. In addition to their successful shopping trips, we also did a lot of online shopping. Amazon mainly, plus Home Depot, Wayfair and Houzz during the project. The delivery trucks from UPS, FedEx or USPS showed up almost every day of our project. Sometimes twice a day! This was where Jane’s ‘designer tent’ came in very handy to store and organize it all while construction continued. And we were very grateful for good (and dry) weather throughout!
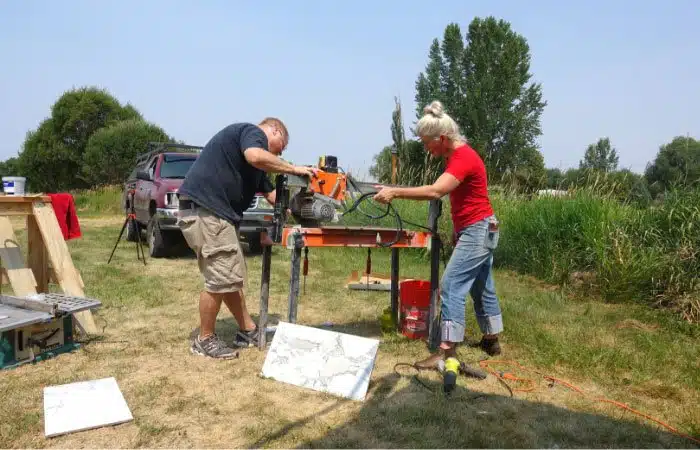
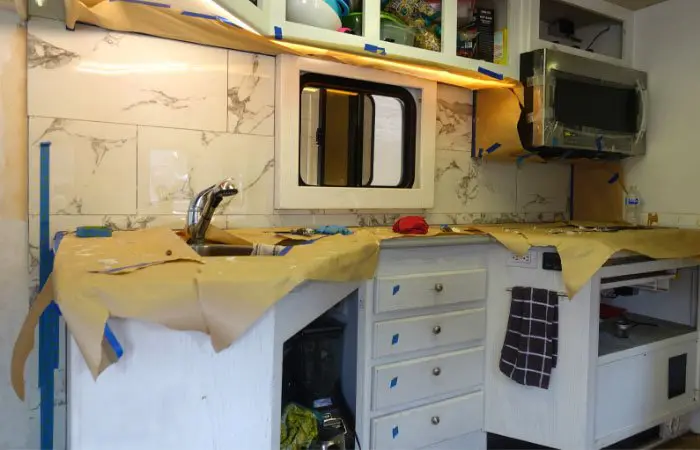
10. Tiling backsplashes in kitchen and bath
Though I have laid tile before, I am certainly no expert. So we asked Brett if he knew anybody who would be able to lay the vertical tiles in our kitchen and bathroom of our RV. Fortunately, he knew the perfect guy for the job and we hired their friend Bruce to do it. We are so glad we did! Bruce did an amazing job, and was able to do things we would never have thought of or wanted to try on our own. Not only that, he had all his own tools, so we didn’t need to buy or rent them.
Another benefit of hiring Bruce was that it saved us a lot of time. The timeline for this renovation was so aggressive that every hour really mattered. We were working 12-16 hours every day, and even worked a few 20 hour days. Even days that we took breaks, still included at least 12 hours of work for some of our awesome team members.
The tiling work only cost us about $250 in labor, plus the cost of materials (grout etc) and it was worth every bit of that in terms of saved time and money! Not to mention, the finished result looked fantastic!
11. Re-installing cabinet doors
Finally, after all the work on the cabinets, we were able to start re-installing them. It was a very important stage of the project because everything started to come back together. CC started to feel more like a home than a construction project once the floor was in, and the cabinet doors started going back on.
Hanging the cabinet doors that were not part of a close together pair was relatively easy. But hanging the doors that met each other in the center were definitely much more challenging. Hinge placement and angle had to be just right, and we couldn’t make many corrections. If you move the hinge too many times, you no longer have solid wood to screw into because of all the holes drilled. So it was tricky, and required a lot of patience. But we were very happy with the end result.
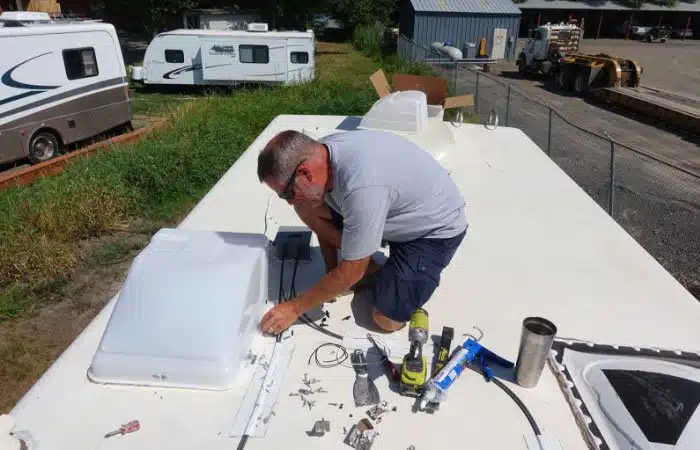
12. Replacing the fantastic vents
Brett was the man on the fans. He did such a great job troubleshooting the wiring and clearly talking through all the steps with the install. But we weren’t able to include it all in this video.
We ordered quite a few items from Dometic. The toilet and also two new fantastic vents and vent covers. One for the kitchen and one for the bathroom. We ordered fans with temperature sensors. But we didn’t want the moisture sensors or fans that had automatic opening and closing because of all the hassles we had in that aspect with the original fans. We generally prefer simpler, less complicated systems in our RV. Because there are fewer items to go wrong, which makes them even more reliable. And it’s usually easier to troubleshoot and fix them.
Brett was a champ on this install project, and provided us all with a lot of laughs too, as you’ll see in the video. We’re big fans of Brett 🙂
13. Dumping our black and grey tanks
As mentioned earlier, we also needed to figure out a way to dump our black tanks. We had been working on the RV for a few weeks and were still living it in as well. So, our tanks were in serious need of emptying after three weeks. Especially in the 90-100 degree F temps we had been experiencing!
The RV was nowhere close to being able to move, and we didn’t have a portable tank (like a Blueboy) to dump with. We were parked about 75 feet away from our friends sewer connection, but that was also uphill. So, regular sewer hoses would definitely not help us solve the problem.
Our solution
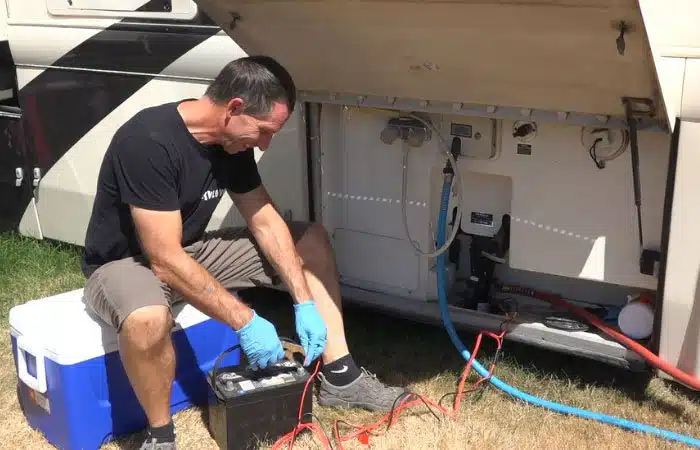
The best option we found was to use a macerator pump. For those not familiar, it is basically like a blender that grinds stuff up and pumps it out through a hose. They are able to move fluid uphill, and over distance. However, the macerator manual said that it could only go a maximum of 50 feet, and we were 75 feet away and needed to go uphill. Unable to find a suitable hose locally, we actually ordered a commercial grade 75 foot hose and had it shipped overnight. But could the macerator push it that distance?
Fortunately, we had success with the Flojet macerator. We were very impressed with how well it performed and used it three times during our stay. I simply touched the wires to a spare 12V battery that Brett had, and that powered the macerator. It took less than 5 minutes to dump both the black and the grey tanks (over 80 gallons) without a hitch. If you would like to learn more about it, you can watch our Road Gear Reviews video about it here.
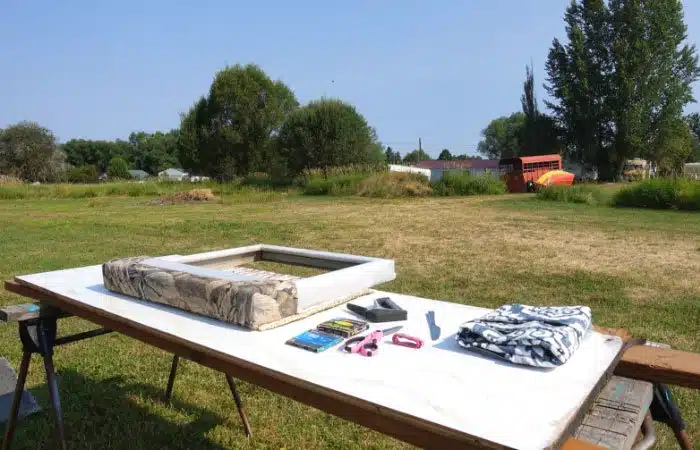
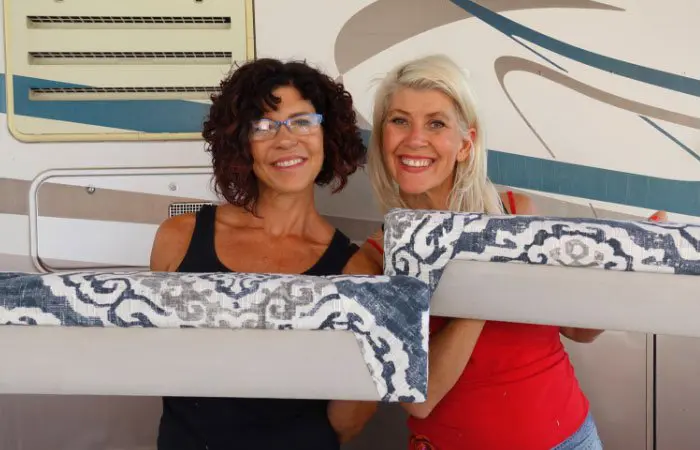
14. Re-upholster window valances
Danelle and Jane did a great job re-upholstering our window valances. To be honest, I was really glad that Julie and the girls did so much filming the amount of work involved with re-covering the valances/window boxes. I was inside the RV, working on other projects, and didn’t really see the valances in between their removal and re-installation.
So reviewing the video footage gave me a much greater appreciation of all that went on behind the scenes on this very substantial project. Only a short clip of it made it into episode 4.
It is amazing how, just by re-covering the top part of the ugly, dated decorative fabric, we were able to completely change the look of the valances. The girls used curtains that Jane had found at Bed, Bath and Beyond, in a blue, grey and white pattern that linked in with the rest of the ‘design story’ in the RV.
It wasn’t just the color of the fabric. By changing how the fabric was laid, it made them appear more modern and contemporary. You get a sneak peek in this episode of how the new valances look, but you will soon see how it all works together with the rest of the RV.
Whew! That was a lot of work.
And that’s it for episode 4 – Re-building our RV! As you might imagine, this <22 minute video just gives you a quick glimpse at the enormous amount of time, work and effort that went into putting CC back together. There were literally hundreds of hours put into this, and we could not have done it without the amazing help we had from Jane, Brett, Danelle and Bruce. Thanks guys! More episodes to come, including how we managed to do this entire renovation off-grid, using just our lithium batteries and solar!
Sign up for our email newsletter with the latest RV park reviews, news and updates.
GOT COMMENTS OR QUESTIONS?
We would love to hear from you. Drop us a note in the comments section below.
More Ultimate RV Makeover Content
Want to check out more on our Ultimate RV Makeover Series? Hover over each image to see the title and episode name.
12 Lessons Learned from Our RV Renovation
Getting Our RV Ready To Travel After our RV Makeover
What Did It Cost? and RV Renovation Questions
Episode 8 The Final Reveal | Ultimate RV Makeover
Episode 7: Finishing Touches | Ultimate RV Makeover
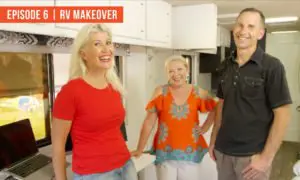
Episode 6: We’re Nearly There! Ultimate RV Makeover
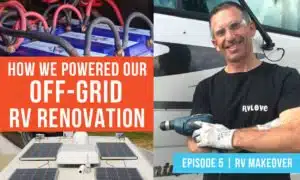
Episode 5: Powering Our Off-Grid RV Renovation | Ultimate RV Makeover
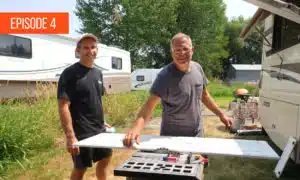
Episode 4: Re-Building Our RV | Ultimate RV Makeover
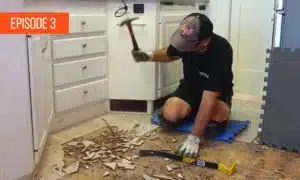
Episode 3: Tearing Our RV Apart! | Ultimate RV Makeover
Episode 2: What Are We Going To Do? Ultimate RV Makeover
Episode 1: Let’s Do This! Ultimate RV Makeover Series
10 thoughts on “Episode 4: Re-Building Our RV | Ultimate RV Makeover”
As the owner of another 1999 Country Coach Intrigue (though slightly different layout than yours), we have loved watching the remodel series and reading the blog posts! Would absolutely love it if you were able to put together a blog post and/or YouTube video showing the floor installation process in more detail, as this is on our short lists of projects to tackle! Thanks for the great content!
Thank you for the kind words about our content, and the suggestion. Congratulations on owning a similar coach. We love ours. We may do a dedicated video on that in the future. The trickiest part of it is just deciding where is the best point to start from, and the width of the first plank so you don’t end up with odd sized planks in the middle, or end. With ours, it actually worked out that we could use a full size plank to start with. In the meantime, maybe consider checking out the floor installation that our friends the Mortons did on their channel. Mortons on the move. Definitely make sure to buy some extra flooring material. Better to have too much and return some, than not have enough and have trouble matching it. All up, it only took a couple days, and we love the difference it has made. Wishing you every success with that project.
Beautiful renovation! You went thru alot of work to document it and share with us! Question..I love the ‘fireplace’ . We have been searching for one to add to our RV. What kind and where did u get it if u dont mind me asking. TIA
Hi there! Thanks so much. Yes a LOT of work, but we love it! We did a lot of research to try and find a fireplace that would fit, specifically a vertical one! We bought it online – it’s the first item here in our RV Makeover store on Amazon – https://www.amazon.com/shop/rvlove – One thing to note… the glass front is curved, so juts out about an extra half inch from what the dimensions tell you. But it worked, just! We love our fireplace!
I would love to see more in depth the process of recovering your window valences…. Hmmm, I might need to do that.
Hi Janet! Yes, we filmed that too, so can do a separate video about how Jane and Danelle did that. We will put it in the content queue!
I love this project! My wife and I have a 2002 Travel Supreme that could probably use some updating and redecorating, though it’s in really incredible shape overall. These videos and blog posts are giving us some great ideas, and I’d love to see some more details on things like the Fantastic Fan installs, and the window valance redo. I can’t wait to see the end result, I’m sure it’s going to be awesome!
I’ve really loved following your journey, and we hope to be able to do the same ourselves hopefully this year after our last kid graduates HS and heads off to college. You guys are mostly responsible for our choice of tow vehicle as well, we picked up a 2015 Jeep Cherokee last summer and are loving it. It’s not the Trailhawk, but it’s got the transmission that makes it towable.
Thanks for all you do! You’re an inspiration to many of us!
Hi Rick, thanks so much! That’s great to hear. Travel Supreme is a great coach – we actually had them on our short list when RV shopping! Am sure yours is beautiful! So glad you are getting some great ideas from our RV Makeover Series. We hope you love the end result too. Also glad to hear you are loving your Jeep – ours has been awesome. Once the major RV makeover series is finished with the big reveal… we will be sharing more detail on some of the things you mentioned, along the lines of “DIY/How-to” videos. We just wanted to keep the initial series big picture about what we did and what’s possible. We probably have enough video footage for a ton more videos with more detail on certain specifics. Thanks again for the positive feedback – we really appreciate it!
WOW!….That was an intense Blog post! Lots and lots of info! I forget how much work can go into a top quality remodel like this and you guys are writing about it on top of it all and not just a few little notes here and there…..nope…RvLove.com is becoming known for its extensive and quality coverage of whatever they point a camera at. You guys should write a book….LOL #livingthervlife. Great Post guys. I could never even pretend to keep up with your enthusiasm and determination. I’m exhausted just watching and reading…..allllll over again.
Thanks Brett. Yes, being such a big job – as you know first hand – we wanted to be able to capture and share as much as possible. It will either inspire or DETER others from undertaking such a project – ha! Glad you are having fun re-living it. It was fun for all of us to work together as a team… we did good. 🙂